Wednesday, June 21, 2017

MaxTrax Camper Mount - March 2017

Click on a photo to view a larger version.


Introduction


I thought MaxTrax would be a potentially useful recovery device for my camper. They are very versatile and easy for one person to deploy. Storing them on the roof would not necessarily be convenient when I needed them, and mounting might be problematic. Hanging them above the cab might work if I didn't already use that space for spare gasoline storage and a portable solar panel. I didn't want to mount them on the side of the camper lest they catch on a branch or someting. Consequently, mounting on the rear seemed the logical place. But how?

I initially thought I'd attach a mount on the rear wall, but I got zero help from the camper manufacturer as to where the frame members could be located. I didn't want to try to use a sheet metal screw on the siding as that didn't seem secure. I could run a bolt all the way through to the inside and use a plate, but that would require removing my compressor refrigerator - too much work. I thought about some sort of bracket attached to the jack brackets, but that had problems, too.

I finally got the idea to mount a board to the siding using strong double-sided tape. I'd then use a strap to hold the MaxTrax against the board. OK, but how would I hold the bottom? I thought some sort of "stirrup" might work, but how to make one? I did what I often do when trying to come up with a design - I wandered around the home improvement store looking at brackets, handles, metal shapes, fasteners, etc. hoping for inspiration. When I spotted the flat shelf support brackets, it all came together.

When mounted, the MaxTrax completely block the access door to the propane bottles. This is not a major problem as I'm too lazy to shut the propane bottle valve each morning while traveling and open it each night as I set up. If you are more safety conscious, it is not difficult to undo the strap and lift the ramps out to access the door (even with the security cable attached.)

MaxTrax on the back of my FWC Fleet. Details of top and bottom, inset.

The mount was designed and constructed in March 2017. This post was written June 2017

Design and Construction


The backboard holds the strap and keeps the ramps from rubbing on the siding. It is 13.25" in length, just wider than the width of the MaxTrax, which are 33cm wide (12.9"). Initially, I cut the board a bit longer, but when I tested before mounting, there was too much leeway with the strap. The shorter board keeps the strap taut. I chose 4" for the height of the board because the aluminum siding on my camper has 1" wide raised plateaus separated by 2" valleys. I could affix 1" wide tape at the top and bottom and there would be a 2" space between the plateaus to run a strap behind.

Backboard with strap in "city" configuration.

Backboard with strap open and ready for the MaxTrax.

I added a radius in the middle of each end where the strap would wrap around from the back to minimize the chance an edge would abrade the strap. I sanded and painted with an exterior latex primer. I then painted all sides with a semi-gloss white latex exterior house paint, with the exception of where I would be affixing the tape. I gave it a second coat and let it dry well.

The left end of the backboard. You can see the area where I added a radius to protect the strap.

The right end of the backboard.

I used 3M Extreme Mounting™ tape as I wasn’t really aware of the VHB alternative at the time. The EM tape bonds almost as well, and since it’s sold as a consumer product it is more readily available and much less expensive. I cut strips of tape to be slightly less than the length the board, one along the top, one along the bottom, on the back. This length is plenty strong. (On a later project, I used strips of VHB tape to bond my custom made solar panel brackets to the camper roof as those brackets were much smaller and needed a stronger bond.)

I actually did a test of the bonding first. I used a 1" length of the EM tape to attach a 1x2" pine board to a piece of bare aluminum. The next day I tried to pull them appart and was unable to do so, even pulling as hard as I could (I did not twist, as there would be no twisting force in my application.) Excellent!

I lightly sanded the area where I would apply the tape on the board and cleaned it with rubbing alcohol. I also used alcohol to clean the camper siding. I attached the tape to the board, pressing hard. Then pulled off the backing and pressed it onto the siding in a position I'd already measured. I left room between the board and lip of the door jam to provide room for the strap. I pressed hard. The tape bonds quickly, but did not put any strain on it until it fully cured.

These are the velcro straps I used: AIRNIX 4 Pack (40" x 1.5") $9.99 on Amazon as of this date. I'd used this style of strap before. The buckle allows it to be drawn taut and the strength of the hooks and loops is significant when the pull is longitudinal.

In case you’re curious, the little multi-colored cord you can see in some of the photos was added as a safety strap. When I first mounted the backboard with the 3M Extreme Mounting tape I was concerned it might not hold on rough roads, so added the cord, which is attached to the door stop/latch, to catch the ramps if the tape came loose. After the White Rim Trail and my last trip, I don’t think that board will ever come loose.

Assembled bottom bracket.

The bottom bracket is comprised of two 8” zinc-plated steel corner braces that I got at the home improvement store. I put them together to make a square ‘C’ shape with a 10.25” opening where the ramp goes. I had intended to spot weld them together, but my neighbor with the welder was out of town when I needed him (and the holes didn’t line up, so I couldn't bolt them together), so I just bound them with gaffer tape, which seems to work great. I then used lag screws to mount the bracket to the board that runs along the back bottom of the camper. Only one set of holes lined up with the camper board, so added a second screw on each side, outside the brace, with a washer. Seems strong enough, and I don't think there is any flex; I may weld it later... or not.

Oblique view of the underside of the bracket and lag screws holding it to wood camper frame.

Here is a quick and dirty composite showing two corner braces before being slid together to shape the bracket. The perspective is off as I just mirrored one product image downloaded off the web:

The ends slide together, one over the other, in the direction of the arrows, to form the '[' shape

The bottom spacer board has two functions. It’s about as thick as the backboard so holds the ramp off the siding. The back of the MaxTrax has spikes (similar to those on top) that you don’t want rubbing on the siding. I insert one end of the MaxTrax ramp with the top tilted out, then slide the spacer in place, then tilt the ramp upright, and strap the top to the backboard. That locks the ramp into the bottom bracket as the last row of spikes on the end of the MaxTrax would catch the bracket before it could jump out even if the velcro strap was loose. Difficult to describe, but if you look at the inset image at the top of this post showing the bottom of the ramp in the bracket, you can see the row of spikes above the bracket, sort of see the row of spikes below the bracket, and you can see the spacer holding the ramp against the bracket between those rows.

Bottom spacer with grooves that fit the lip of the MaxTrax.

The bottom spacer was initially a little too think, and consequently put too much stress on the bracket when I strapped the top in place. Rather than use a thiner board I used a Dremel tool to carve grooves in the spacer. The lip of the ramp fits into these grooves. This provides the proper spacing between the ramp and camper siding and the grooves also keep the spacer board from working its way out due to vibration. I primed and painted the board, as I did the backboard.

When on the road with the MaxTrax, I use a bicycle security cable to lock them to the truck frame. I take them off when I'm not traveling rather than risk someone cutting the cable and liberating them.

I hope my mount will help you figure out a way to mount yours. If you have questions, either leave a comment, or email me at the address at the top of the page.
Tuesday, June 20, 2017

Crownpoint Navajo Rug Auction - June 2017

Beautiful Storm Pattern Navajo Rug

I had not been that interested in Navajo rugs until I recently saw one at the Teec Nos Pos Trading Post that opened my eyes. I knew about the Crownpoint Rug Auction from reading Tony Hillerman's mysteries featuring Jim Chee and Lt. Leaphorn of the Navajo Nation Police. (I highly recommend these wonderful books if you have any interest in the southwest or its native peoples, or just want a well crafted mystery novel.) The rug auction seemed like a excellent opportunity to see lots of rugs and get an idea about the market value. Also a good way to pick up a couple of rugs for myself.

Friday, June 9, 2017


Crownpoint is a community on the Navajo Reservation in western New Mexico. You turn north off I-40 at Thoreau (pronounced "threw" by the natives, I'm told), between Gallup & Grants, and drive about 30 miles north to the town. The auction is held in the elementary school gymnasium, which is a multi-purpose room with a stage at one end, basketball hoops at the other end, and even a kitchen to serve the kids lunch.

The auction is held in the multipurpose gymnasium. Food vendors have set up outside.
The parking lot fills early, but there is plenty of parking across the street. 

The auction is now run by the Navajo Weavers' Association of Crownpoint. Detailed information on the auction and Navajo rugs can be found on their website, but I'll touch the highlights in this post. The auction is held once a month, usually on the second Friday. "Rugs" is the accepted term for various Navajo weavings regardless if it's intended to lay on someones floor or hang from the wall or even wrap around one's shoulders. There were a few art pieces and one wrap offered this evening.

Prospective buyers examining rugs. This is early before the crush.
You register as a bidder with the ladies at the table on stage.

They begin accepting rugs from the weavers at 4pm on the day of the auction. Once checked-in the rugs are placed on tables, roughly sorted by size. Prospective buyers can begin examining the rugs once they are placed on display. I got there about 5pm. Next time I'll aim for 5:30. If you wish to bid on any rugs, you register with the table set on the stage to get a bidder's number. Those ladies, and everyone I talked to, were very friendly and welcoming.

Each rug has a tag with a serial number, the weaver's name, and where they're from. I had in mind specific locations in my home for two rugs. I'd measured those spots, brought a tape measure, and small notebook along. As I found rugs that I liked, I measured them, copied the serial number and a brief description in my notes. I was surprised to find this was such a social occasion between the prospective buyers as we commented on the rugs and moved them about. There were people from as far away as Washington state and Florida. Seems a number of folks had planned their vacations to include the auction. Many of us were there for the first time, but there were also those who had attended many auctions here.

Native artisans selling their work.

The weavers' association also rents space to native artisans to display and sell their wares. There were many tables of jewelry, pottery, and other crafts.

Rugs awaiting buyers. You can see the identifying tag tied to the corner of each rug.

At 6:30pm they take the rugs backstage and prepare for the auction. This is a good time to visit the kitchen to purchase a Navajo taco, or fry-bread, and a soda. Yummy! There were also food vendors set up outside the gym, but I didn't try those this time.

The auction began at 7pm with general announcements, and an opening prayer, in both English and Navajo. The auctioneers were two gentlemen from Mountainair, NM in full western attire. The auctioneers were excellent, they've obviously been calling this auction for some years. They were not only very entertaining, but made sure those who won a rug felt good about their purchase.

Auction of one of the larger rugs in progress.

As fate would have it, since this was my first auction, the very first rug offered for bidding was one on my list. It was a striking "storm" pattern in red, gray, black, and white. I bid, and had to raise my bid a time or two (don't really recall too many details as it was happening so fast) and won the rug! The beautiful rug I won is shown at the top of this post.

Rugs were sized from about a foot square to maybe 5' x 8' (as I wasn't buying a larger rug, I didn't actually measure any of those.) There were also a few rug-on-loom items. These are miniature, incomplete rugs still in a small loom. The looms were typically constructed using a sculptural "tree" to represent historical, full-size, weaving looms. I didn't have the presence of mind to photograph any of those. Here is an example from Garland's.

Selling prices depended upon size and quality of the weaving. There were a few that featured home-spun yarn and those were more expensive, as were the few attributed to Two Grey Hills. A few of the smallest rugs sold for less than $100, others up to several hundred for typical rugs. One exquisite small rug sold for $1850, if I recall correctly. Medium sized rugs sold for around $500 to $1200. The larger rugs sold for around $1000 to $2000. There was one small circular rug, which is uncommon - I don't recall its selling price. Not all the rugs sold. I'd guess about 10 out of the 50 or 60 rugs offered did not get a bid that met the minimum.

Auction in full swing.

I was still looking for a medium-small rug to hang over my entertainment center. I bid on several, but dropped out as the price went too high. I finally did win a bird pictorial rug, also known as a Tree of Life, as it pictures a corn stalk "tree" with many colorful birds perched and flying. These rugs are more difficult to create as the loom does not lend itself naturally to rounded designs.

My Tree of Life, bird pictorial, rug.

Once a purchaser has won a rug or rugs and no longer wishes to bid on others, they can turn in their bidding card, pay at a table set to the side of the stage even while the auction is ongoing. Once you pay, you can collect your rug(s). The auction accepts cash, checks or credit cards. There is a 4% processing charge if you use a credit card, so I was glad I had my check book (and drivers license). The weavers get a check issued by the association immediately after the auction.

This night the auction ended about 9:30pm. One of the regular attendees had told me there were fewer rugs than usual this time. I stayed to the end and so ended up in a line at the table where you pay. Consequently, I didn't get out until 10pm.

Many, including myself, felt this was the most beautiful rug offered in the auction.
Curtis, who lives in Albuquerque won the rug and proudly held it up for a photo.

I didn't want to drive back home after the auction even though it is less than a 3 hour drive. So I  stayed in the Coal Mine Campground at the foot of Mount Taylor, which was only about an hour from Crownpoint. The next day I took a scenic route home via the Pueblo Pintado ruins. I haven't decided if this will be a blog post or if I'll just link to a gallery of photos. I will update this post once I decide.

Thanks for reading my rug auction tale. I hope you enjoyed reading about the auction and I strongly encourage you to attend one Friday. Not only are there beautiful Navajo rugs to admire, but the whole event was entertaining and great fun!


Sunday, June 18, 2017

Northern Arizona and Southern Utah; Part 4 - May 2017

Continued from Part 3; North Rim of the Grand Canyon and Kaibab Plateau

Part 4
Buck Farm Overlook
Navajo National Monument


Remember, you can click on any photo for a larger version.

Monday, May 22, 2017 (continued)


Looking back. You can just see the East Side Game Road climb up the ridge.

I turned right on FR-8910, heading south. The road dove down into lots of washes and up the other side of those, but the road was in great shape for being just dirt with very little washboard. There were even plenty of road signs to keep me aimed at my destination and warnings about it being a flash flood area.

Buck Farm Point


There was one interesting junction where all three roads were signed 8910 - the one I'd come down, one to Saddle Mountain, and one to Buck Farm Point. I later looked at the map and saw the road formed a loop beginning at that junction. I took the left fork. Then there was a sign to the viewpoint where I turned left onto 445H.

View from Horseshoe Point

The dispersed campsite right next to Horseshoe Point.

The first overlook you come to has a nice dispersed campsite right next to the rim and a fantastic view, though you cannot see the river from here. I suspect it could become extremely windy, however, and there is no shade for many miles. There is a wide ledge about 10 or 20 feet below the rim where one could set up a tent or perhaps a small fire out of the wind - you can see it in the first photo above; it's covered in fine, red gravel. There were nice flat rocks to sit upon and I had lunch there. I found a USGS marker. Apparently this is Horseshoe Point.

I tend to take a photo of these historical USGS markers when I stumble upon one. This one is almost 80 years old.

You continue on another couple of miles to Buck Farm Overlook. People have camped there, but it did not look at all hospitable to me. You have to walk 50 yards or so to get to the actual overlook, or I should say one of them. The others require clambering down and up some rock formations. You should wear your hiking boots to do this. You can see a bit of the river from these. I also got photos of some colorful Collard Lizards.

View downstream of the Colorado River. Saddle Mountain on the right.

I thought this was a colorful fellow, but I've since learned the males are very green.
The orange stripes indicate that this is a pregnant female.

Looking upstream of the Colorado River. You can just make out the Vermilion Cliffs on the horizon.

A panorama taken from the location above.

Looking back at my truck, parked at the end of the road. The Kaibab Plateau is in the background.

I belive, from my reading, that this is an immature Collard Lizard.

I believe this is a female lizard.

The sandstone at the east end of the point had this "crust" of hard, dark rock firmly attached.
I don't know what this is called. If you know please leave a comment. Thanks.

A last look down the canyon.

Only a few miles from the highway I stopped to photograph these yellow flowers with the cliffs in the background.
I think the flowers are Desert Princesplume (Stanleya pinnata).

I left the overlook and drove back to the county road, turning north, headed toward Alt-89. This is dry country, though with a back drop of the Kaibab Plateau and before long the Vermilion Cliffs. I stopped at the info kiosk area just prior to pavement to air up and again a good samaritan pulled off the highway to ask if I needed help. I thanked them for asking and assured them I was OK. I guess I need to lower the hood once I hook up my air pump from now on, so I don't raise a false alarm.

I turned right on the highway and followed it to US-89, which I then followed south. I stopped in The Gap, not to be confused with Blue Gap, to fill my tank as I'd noticed their price for gasoline was low for the area. I then turned left onto US-160 toward Tuba City.

Tuba City


When I passed through here about 15 years ago I stumbled into a restaurant that served very good food. I can't remember if I'd ordered a combination plate or just an enchilada plate, but remember they prepared it with red and green chile just like in New Mexico. I didn't know the name, but remembered approximately where it was. I found it. It is the Hogan Restaurant. I ordered the enchilada plate, beef and chicken, red and green, and it was excellent. There were three Navajo Nation Police officers eating Navajo Tacos, and as I passed them on the way to wash my hands, I asked them if the dish was good. They assured me it was. I was tempted to say something about Jim Chee and Lt. Leaphorn, but I managed to control myself :-) I left a 4-Star Yelp review once I got home.

Navajo National Monument


From Tuba City I continued east on US-160 to the turn off for Navajo National Monument. This is the site for the Betatakin cliff dwellings and the trailhead for Keet Seel cliff dwellings. You need to sign up for ranger led hikes to visit either ruin, though there are shorter trails that overlook Betatakin. The monument is administered jointly by the NPS and Navajo Nation Tribal Parks.

They also have two very nice, free campgrounds. One on the hill, Sunset View, accessed by a paved loop, and one along a dirt road, Canyon View, past the visitor center. I'd pitched my tent in this later area on the trip I mentioned above with regard to Tuba City. I chose to camp there this time, too, as I found a site to set up in the shade on this very warm afternoon.

My campsite with much appreciated shade.

Canyon cliffs lit by the setting sun.

The trees have grown since I was last there blocking much of the view, however.

I met a retired gentleman from the midwest. He had been a schoolteacher in Kayenta and was passing though after having helped out with photography for the Shiprock marathon. He had an interesting perspective on The Dine' and the issues/conflicts on the reservation with regard to the modern, outside world. He also told me where to find some interesting pools on the slickrock near the campground. I would go look for those in the morning.

Sunset from my campsite.

Tuesday, May 23


Navajo National Monument (continued)


As I was easily within a day's drive of home, so I took my time here. First, I set off to find the small vernal pools on the slickrock below the campground. As there were lots of birds singing, I took both cameras. I got both landscapes and wild bird photos.

Rain filled pool on the slickrock.

A handsome Western Bluebird watching for flying bugs to intercept.

Looking along the slickrock in the direction of the visitor center.

A Juniper Titmouse in his name-sake tree.

Morning view of my campsite.

On my return, I broke camp and drove to the visitor center. I walked the short trail down to the Betatakin overlook. The light would have been better in the evening, but I'd been too tired and hot to do the walk the day before. It was, nonetheless, a beautiful walk with lots of wildflowers and more birds singing.

Wildflower along Sandal Trail.

View into the canyon from the overlook. The dwellings are in the alcove to the left.

A cheerful flower in the mustard family, I believe.

A closer view of Betatakin (a composite of two images to adjust exposure.)

A detailed view of Betatakin pieced together from 3 exposures taken with my 300mm lens.

I should have taken my 70-200mm lens. The lenses I had with me were either too wide or too long. So I've pieced together multiple images to be able to show you Betatakin in as much detail as you can get from the overlook.

On my way back up the trail I captured the image of this Ash-throated Flycatcher.

Another look at Betatakin Canyon from along the trail.

As I was leaving the monument, I stopped for one more photo at the Tsengi Point Overlook.

Kayenta


Leaving the national monument, I turned left on the highway and headed to Kayenta. I was hungry by this time and had hoped to find Navajo vendors selling food. I did not, so stopped at Bashas Market and selected a rib dinner from the deli's hot case.

Church Rock - a volcanic remnant.

Continuing along 160 I stopped to photograph Church Rock, a volcanic neck. I had not driven this stretch of US-160 between the turn-off to Many Farms and the turn off to Mexican Hat. It is a scenic area with the Baby Rocks formations, that I failed to photograph, and the long Cock's Comb ridge that will eventually work its way north into Utah.

Teec Nos Pos


I took US-64 at the junction and drove into Teec Nos Pos. I stopped at the trading post and got permission to photograph inside. I've added those photos to last month's blog post on the trading post.

Highway 666


By the time I got to Shiprock, I realized I was ahead of schedule. If I took my usual way home I'd hit the city right at rush hour. Rather than do that, I chose a longer route that would take more time and allow me to see another new area I'd not been through. I drove south on US-491, formerly US-666.

The Chuska Mountains are on the right as you drive south. There are several interesting volcanic necks, little cousins of Ship Rock along the way, too. It was too hot and too windy for me to want to stop for photos, sorry. Rather than drive all the way into Gallup, I was going to take a turn-off to Crownpoint, then head back to the freeway, but somehow I missed the turn. There were stretches of road construction, so maybe the sign had been misplaced, or perhaps I was just on the Rez.

At Gallup I rejoined I-40 and headed east toward home.

Laguna


I was going to stop in Grants where I knew there was a Blake's Lotaburger that served up a good green chile cheeseburger. Then I saw a billboard that reminded me I had been wanting to try a Laguna Burger in the town by Laguna Pueblo. I'd heard good things about these special green chile cheeseburgers, so this would be a perfect opportunity to try one.

The Laguna Burger is in the same building as the 66 Pit Stop gas station/convenience store at Exit 114. It was cool inside and I ordered a Laguna Burger combo "for here." OMG, it was delicious! The half-pound beef patty was very flavorful, the green chile well roasted and not too hot, and the fries were some of the best I've ever had - you felt like you were eating real potatoes, fried to golden perfection. Do yourself a favor and stop there or the other location on the opposite side of the freeway from the 66 Casino, closer to Albuquerque. It's also in a 66 Pit Stop gas station/convenience store. I left a 5-Star Yelp Review. [Note: there is now a Laguna Burger in Albuquerque, across 12th from the Indian Pueblo Cultural Center. I ate there 12-23-17. The burger was very good though more expensive than in Laguna, but the fries were a big disappointment - instead of full size and perfectly cooked, they were more of the shoestring variety and greasy, sigh.]

With a blissfully full belly I returned to the freeway and to home, comfortably after rush hour and still with plenty of light to unpack the camper.

A wonderful week's journey. Thanks for joining me.

Northern Arizona and Southern Utah; Part 3 - May 2017

Continues from Part 2; House Rock Valley, AZ; Cottonwood Canyon, UT; Kodachrome State Park, UT; and Skutumpah Road, UT.

Part 3
Crazy Jug Point, Kaibab National Forest
North Rim of Grand Canyon National Park
Tater Ridge, Kaibab National Forest


Saturday, May 20, 2017 (continued)


Remember, you can click on any photo for a larger version.

Fredonia


I stopped briefly in Fredonia at the Forest Service District Office. I suspected they'd be closed on Saturday, but hoped there would be a map to look at and maybe some brochures available. Indeed they were closed, but the lobby was open with a Kaibab NF map on the wall behind glass, plus a large selection of free brochures and a Motor Vehicle Use Map for the district.

I was heading to Crazy Jug Point in the Kaibab National Forest that my friend Bob had recommended; Dawn had camped near there, too. It looked on the NF map that taking FR-22 out of Fredonia would be the most direct way there, however, the National Forest map also seemed to show that 22 didn't go all the way through - there was a discontinuity, so instead I followed Alt-89 to Jacob Lake as the brochure which gave directions to my destination started those direction from the visitor center there.

Kaibab Plateau Visitor Center


When I got to Jacob Lake it turned out that the Kaibab Plateau visitor center was indeed open on Saturday. Apparently this facility, operated both by the National Forest and the Grand Canyon Association is open daily due to the large number of visitors headed to the forest and the North Rim. It closes at 5pm, local time, so I just made it.

I bought the official NF map there (which was $15 rather than the ususal $10, but larger than most other NF maps). I discussed getting to Crazy Jug Point with the nice lady at the counter and pointed out that the map didn't show FR-22 as going all the way through. She was surprised as she knew it did. Turns out that is a error on the map printing. You can drive on 22 all the way from Fredonia to the Grand Canyon highway 67 near the Kaibab Lodge.

Crazy Jug Point, Kaibab Plateau


In any case, I set off from the VC via FR-461 & 462, following the Scenic Viewpoints brochure. I had to lose lots of elevation that I had recently gained on the main highway climbing up onto the plateau, so if coming from the west, FR-22 is the best way in and is actually paved part of the way.

Traveling down 22 you get a sense for just how large the Kaibab NF is - and this is just the northern part. FR-22 is gravel and in very good shape. After turning off 22 onto FR-425 the road is narrower and bumpier, but still in very good conditon. Another junction and the road, FR-292, is smaller, still. Then the last junction, take FR-292B to the point. It helped having a map as there was not a directional sign at every junction.

Early evening view to the southeast (iPhone photo).

From the same location as the previous photo, just pointed a little to the right (iPhone photo).

At last, Crazy Jug Point, and pretty late in the evening, too. I was glad to get here after a long day of driving, but I wasn't complaining as it had been an interesting drive. There is one dispersed style campsite at the point and I pulled into it. It is in the center of the turn-around loop and is surrounded by piƱons.

Campsite in the middle of the cul-de-sac is big enough for a couple vehicles and tents.

I was still figuring out where exactly to position my camper, when a soft-top jeep blaring rock music showed up and stopped at the point parking area. This couple with their enormous, free ranging dog were looking for a place to canyoneer. The fellow asked if I was camping there that night. I said "yes." He replied that they'd look elsewhere then, to my great relief. I suggested Monument Point, though I admitted that I knew nothing about it, but had seen the sign coming in. I hoped they'd land far enough away I wouldn't hear their loud music, which thankfully seemed to be the case.

Looking toward the southeast as the sun sinks.

I'm guessing that rock formation in the foreground is the Crazy Jug.

A couple other vehicles came by in the evening to look at the view. They looked like hunters with their beat-up trucks and full cammo attire. When they finally left I had the place to myself. There were no clouds to augment the sunset, but the colors in the darkening sky were beautiful.

The sitting sun through the trees.

My campsite in the last rays of the sun.

Sunday, May 21


Crazy Jug Point (continued)


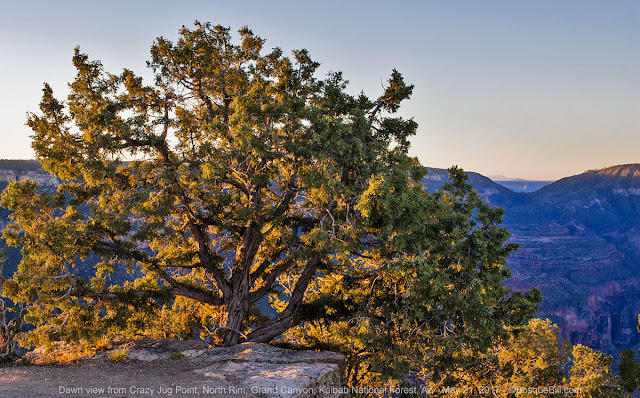
The canyon was still in shadow, but this piƱon at the point was lit by the rising sun.

I was up at dawn to see if there were good photo opportunities. Not so much at dawn, but as the morning progressed I kept snapping. It was a beautiful morning.

Morning view toward the west.

Pretty phlox flowers at my feet.

Southwest view framed by the trees.

You can't see off the rim from the campsite or parking area, so I carried my chair a little ways down the trail to the point so I could sit and admire the view. I also tried to photograph the many birds that were singing and flitting around - with minimal success.

The best bird photo of the morning - not a great image, but a great memory.

One of the surprises, is that there was cell service on the point - if I stood in a certain place facing a certain way. Perhaps the tower was on the south side. In any case it allowed me to have a nice conversation with a friend and gloat about my view.

A nearly 180Āŗ panorama toward the west from the trail to the point.

I broke camp and reversed course back to FR-22. There were smaller roads that looked like they might be more direct, but the first one I saw looked narrow and rough. I stopped to say good morning to a gentleman with a camera standing beside his small expedition vehicle emblazoned with "Switzerland" across the front. He was totally enraptured by the area. He said the national forest was larger than the whole of Switzerland. A statement that is hyperbole, but I understood the feeling. The area feels huge! Looking it up later, North Kaibab NF is just over 1000 square miles. They were headed to Crazy Jug Point.

I stopped to have lunch in a dispersed site before reaching FR-22. FYI, it seems there are dispersed sites sprinkled around the side roads, but none directly beside 22. There are many roads and scenic points to explore around the Kaibab Plateau. Those will wait for another trip as I was headed to the North Rim. FR-22 ends at Highway 67, the Grand Canyon Highway. I turned south on the pavement.

Grand Canyon National Park


I drove to the practical end of the road and found a spot in the parking lot. I stopped in at the visitor center. I wanted to enquire about the road to Point Sublime. I'd heard it was gorgeous, and it was a route in my Arizona 4-Wheel-Drive guide book.  The book said you could get a permit to camp there, though everything else I'd read stated in no uncertain terms that there was no dispersed camping anywhere in the the national park.

The young ranger at the counter told me the condition of the road to Point Sublime was "nasty." She said they had not had the opportunity to clear the deadfalls from the road yet (The North Rim had only been open 1 week.) She said the fire crew usually did that task, but they were no longer permanently assigned to the park. She didn't know when the road would be cleared. I asked about camping. She said that the Back Country Office did, in fact, issue camping permits for Point Sublime and gave me the phone number so I could check with them later in the year. Their facility was just back up the road.

The view from Bright Angel Point.

The view looking just to the east side from the point.

I walked down the paved trail to Bright Angel Point. The North Rim doesn't get anywhere near the number of visitors as the South Rim, but there were still plenty with a constant parade along the trail to the point.

The point overlook from the rocks just above it.

Panoramic view from Bright Angel Point.

The view from the trail and the point was magnificent, but understand, it's not as spectacular or breathtaking as the views from the South Rim. The canyon is much broader, if that's the right term, on the south side. The Colorado River cannot even be glimpsed from Bright Angel Point. That didn't stop me from taking lots of photos, none of which really capture the space.

Cape Royal View

I returned to my truck and drove north to the junction that would take me to the eastern viewpoints of the North Rim. I drove first to Cape Royal and took photos there and at Angels Window. I could at last see a piece of the Colorado River in the distance. I think the views from here are more beautiful than at Bright Angel Point, but maybe that's just me.

Another Cape Royal view. If you look carefully you can see the river, middle left.

Another Cape Royal view.

Looking more to the east with the river, middle right.

Thor Temple as seen from Cape Royal.

Another Cape Royal view.

Angels Window at Cape Royal.

A 180Āŗ panorama from the top of the Angels Window formation.

I drove back up the road and this time took the turn-off to Point Imperial. This viewpoint looks toward the east. Unfortunately, by this time of the afternoon the clouds that had been building all day really began to negatively affect the light. I guess I'm just not skilled enough to turn those conditions into exciting photos.

This is probably the best of the photos I attempted at Point Imperial.

A panorama from Point Imperial.

It felt like it was getting late in the day and I needed to find a place to camp for the night. I'd noticed in that same Arizona 4-Wheel-Drive guide book a route that they marked easy* that would lead east from highway 67, up around the north side of the Saddle Mountain Wilderness, then down off the plateau meeting up with the Buffalo Ranch Road. From there I could check out the Buck Farm Overlook along the Colorado River.

*I had learned the hard way that what this book rated "easy" (Orderville Canyon Road) wasn't necessarily so.

I didn't really want to do the whole drive that day (and am so glad I didn't attempt to do so.) The book mentioned a side road that had beautiful dispersed campsites, so that was my plan.

Kaibab National Forest, Tater Ridge


The turn-off of 67 to the gravel road, FR-213, is halfway between milemarkers 601 and 602. A little more than 2 miles along is a right turn onto FR-221. This narrow dirt road has a few bumpy spots and a few pinch points where deadfalls had been cut, but not removed from the full width of the road. There are a few nice dispersed campsites, but continue on.

My campsite among the Ponderosa pines with a great view.

I found a wonderful spot with a fabulous view east off the plateau 5 miles from the pavement. There would be room for several campers and the ground was suitable for tents, too. Although I was not far from the ridge line, the tall Ponderosa pines blocked the breeze. The cloud cover and the haze in the distance was not conducive to photography, but I kept trying to capture the canyon of the Colorado River down on the plain.

View from near my campsite of the southern section of Marble Canyon.
I would head that direction the next day.

Monday, May 22


Kaibab NF (continued)


One of the aspen groves along FR-213

I leisurely broke camp and drove back to FR-213 where I turned right. The road was smooth and passed through Aspen groves. After 4 or 5 miles I came to a small spur at the top of the ridge where one could camp if the wind was not strong, though there were trees, they wouldn't block the wind very much.

Then a very steep section of rocky switchbacks began. Some of the rocks were anchored and quite big. It was necessary to ease slowly over those. In other areas the rocks were baseball sized and loose. As I drove down I was thinking how difficult it would be to be trying to drive up. I didn't pause to measure, but I bet I lost about a thousand feet in elevation (good guess, according to Google Earth).

At the bottom, the road 'T's into FR-220. The guide book said to take a right. Left is a connection to the Buffalo Ranch TR #6 and is rated "moderate." To my chagrin, at the bottom of those switchbacks was a orange-diamond Road Closed sign. It sat to the right of 220, between it and where I'd just come down - a rather ambiguous placement. I wasn't sure if it referred to the tricky stretch I'd just done or the unknown road I was planning to drive, or even how recent it was.

I did not want to drive back up what I'd just descended, so I did what I'd advise anyone else not to do, I took the right turn and drove on. The road was rough and rocky. There were more switchback descents. I was paranoid that I'd get to the bottom of a gully and there would be a washout. On occasion I'd see tire tracks that looked like they might have been left by a road maintenance truck, such as a grader or front loader. My hope was that if indeed this road had been closed, that the truck ahead was clearing the way.

Consequently, I didn't enjoy this section as much as if I'd been assured passage. I knew if worst came to worst, I could reverse course. That would not be fun, but I didn't feel in peril. There was one short section, climbing steeply out of a gully, that looked bad enough that I put the truck in 4-wheel-LOW to climb out. There was only that one small section that required LOW, though I used 4-wheel-drive in many places just for traction, not that I was afraid of getting stuck.

East Side Game Road


I think that's Tater Ridge behind me (to the left) from whence I came.

The canyon that ran next to this section of road.

After what seemed a long time, and more loss of elevation, I came out on a ridge. The road ran along the side of a canyon. According to my navigation app this road is called the East Side Game Trail. I felt confident enough along this section to finally stop and take a few photos. As I continued, the road descended even farther onto the plain below.

The last section of road on the ridge before it drops down.
I still wasn't 100% sure if the road was open all the way down, but I was feeling better.

I was very relieved when I reached Buffalo Ranch Road, county 8910, which was wide and looked well traveled. By this time I felt I'd lost another 2000 feet. According to Google Earth (which I consulted while writing this post) I'd camped at 8580 feet; the top of the first switchbacks were about 8300'; and the junction with the county road was at 5565'. So yep, I was now 3000 feet lower than where I woke up that morning. I'd gone from fir & pine, though piƱon & juniper, to sagebrush and grasses.

NOTE: the route I just took off the Kaibab Plateau is not for the faint of heart or for those without a high-clearance vehicle and the skills to drive it. That said, the section from the Grand Canyon Highway on 213 and 221 was readily accessible and I highly recommend my camping spot. A vehicle wider than a standard pickup truck would not have been able to drive between the sections of the fallen trees, but presumably later in the season the forest service would have come back and done a better job of clearing those.

That concludes my time on the Kaibab Plateau. My journey continues in Part 4 where I explore the Buck Farm Overlook and then Navajo National Park on my way home.